 As I said above, a few years ago roaming profiles were fashionable for several reasons:
 In this tutorial, I will explain how to set up roaming profiles for your users in an Active Directory environment. When I started working (already a few years ago), roaming profiles were all the rage. Roaming profiles store user (profile) data (C:\Users\) in a shared folder that is located on a server. This allows the user to find their environment when they change computers, which is quite practical for people who often change workstations or when renewing their hardware, this allows all data to be recovered and also the configuration of applications. As I said above, a few years ago roaming profiles were fashionable for several reasons:
Today, there are other solutions that I will discuss at the conclusion of this tutorial.
In this tutorial, I will create and use several group policies (GPO), I will not go through the creation of each one step by step.
For each GPO, it will first be created in the Group Policy Object container, configured and then linked in the Active Directory tree.
Unlike user folder redirection where access is made from the server, the roaming profile is copied locally on the computer.
Changes are synchronized when the user logs on and off the computer.
There are two types of roaming profiles:
It is therefore necessary to take into account that the session opening and closing time will be longer due to synchronization.
The main consideration to take into account is the disk space occupied by roaming profiles which can quickly reach 10 GB or even much more, especially if users store their Outlook archive in their user folder.
For an organization of 100 users with 10 GB profiles, that’s already 1 TB of disk space occupied on a server; backups must then be taken into account.
With a profile of this size, the logon and logoff time will be significantly increased.
We must also take into account the type of computer, in business we find more and more laptops and users tend to put them to sleep by closing the screen, so synchronization does not take place. .
To put an end to the negative points, I will come back to messaging, which can pose problems especially when using the Outlook client. We will start with the Outlook cache file (ost), when the cache is activated, Outlook creates an OST file for synchronization and offline consultation, this file can be several Gigabytes, this file will be systematically synchronized in its entirety. In the case of a roaming profile, you should avoid using Outlook caching, to have to synchronize the file which will also be saved. The other problematic point with Outlook is the mail archives (PST) which can also quickly become several Giga and there too this file will be synchronized each time. For Outlook archives, I don’t really have a solution, other than increasing the mailbox quota, because in any case, if the PST file is on a file server, there is there is a good chance that this will be backed up, so it might as well be done through Exchange.
To set up roaming profiles, you will first need a server with a shared folder for storing the profiles.
We do not store the profiles on a domain controller, this mainly for security reasons, by definition, we do not know what is in the users folder, it is possible that a virus is there and this is done will be synchronized to the domain controller.
To do this well, you also need a server with the DFS (Distributed File System) role which will allow us to present the sharing dedicated to the profile via the root of the domain in the form \domain-ad-name\xxxx\ yyyy rather than \server\yyyy.
This consideration should be taken into account for the future, the day you need to migrate the server that stores the profiles, you just need to modify the target in the DFS namespace which is simpler than going to modify the group policies or user objects in the Active Directory.
Choose the mode of application of roaming profiles, there are two solutions:
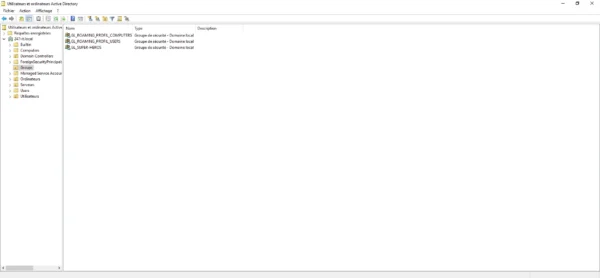
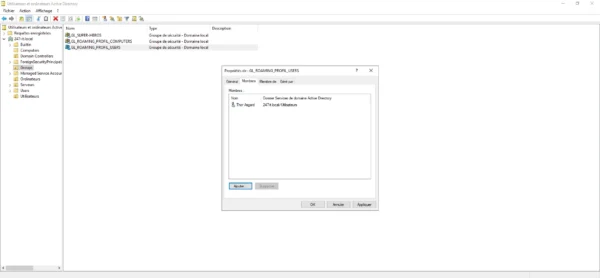
To set up roaming profiles, I will use two Active Directory groups:
This part is important, because it involves setting the right authorizations for proper operation.
Here I will create a specific folder in the D: drive of my file server.
In the drive of your choice, create a folder, for me it will be Profiles.

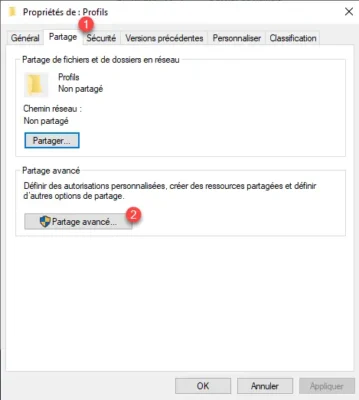
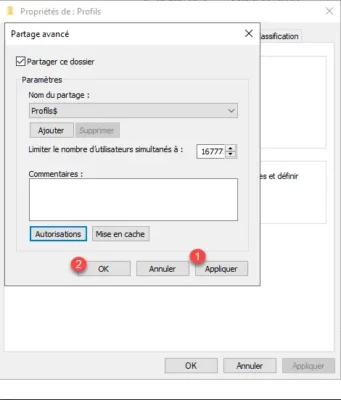
Open the Folder Properties, go to the Sharing 1 tab and click on the Advanced Sharing 2 button.
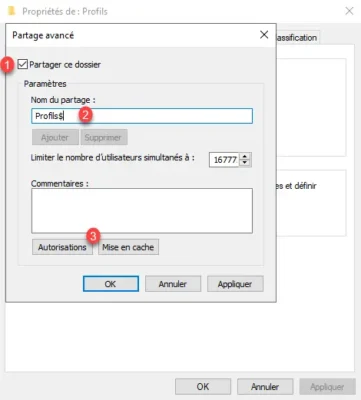
Check the Share this folder 1 box, name the sharing 2 then click on the Permissions 3 button.
The $ at the end of the share name simply hides it in Windows Explorer, this is in no way a security solution, only SMB and NTFS rights will secure the folder and what it contains.
If you want to effectively hide folders, it is best to use Access-Based Enumeration.
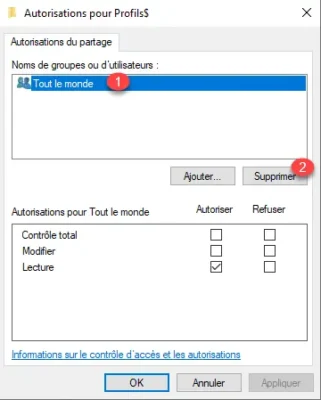
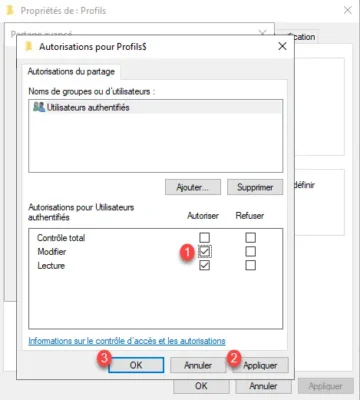
By default, permissions are granted to Everyone, select group 1 and click Remove 2 .
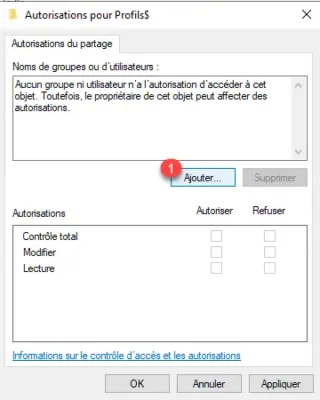
There is no longer any sharing authorization, click on the Add 1 button.
Select Authenticated Users 1 to add it to the share, click OK 2 .

Add the Modify 1 permission then click Apply 2 and OK 3 .
Do the same with the advanced sharing window, click on Apply 1 and OK 2 to close it.
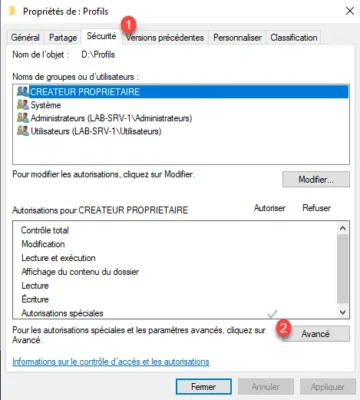
The sharing is ready, we will now switch to NTFS rights on the Profiles folder.
Go to the Security 1 tab and click on the Advanced 2 button.
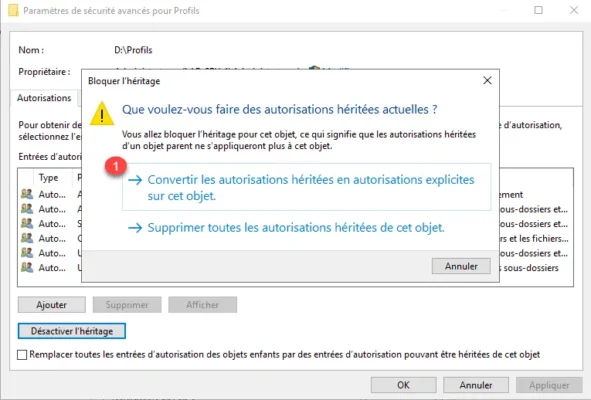
We will start by disabling inheritance and then configuring the correct NTFS permissions. Click on the Disable Inheritance 1 button.
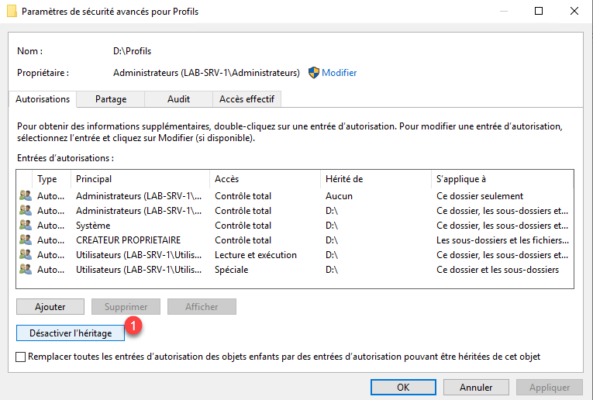
To avoid having to redo all the authorizations, we will keep the existing ones and delete this one which is in excess. Click on Convert inherited permissions to explicit permissions on this object 1 .
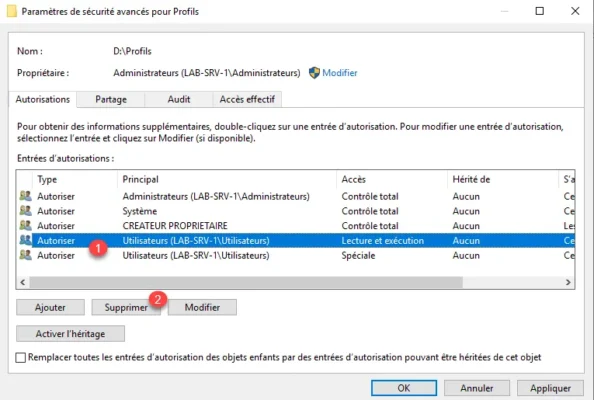
Now, we will remove the User permissions which give read access to all users in the domain. For each authorization, select the User 1 line and click on Delete 2 . (You have to do it line by line)
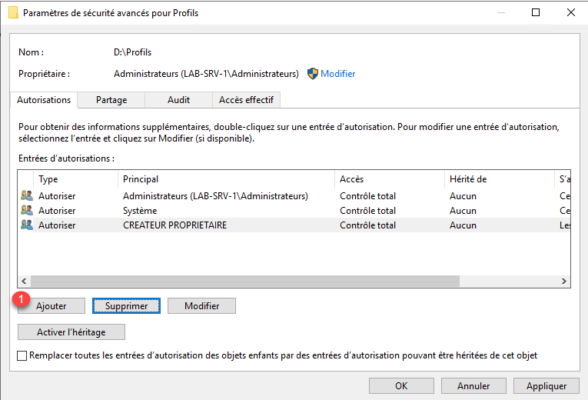
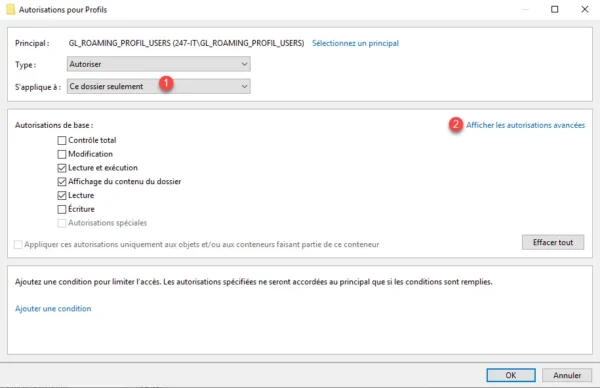
Unnecessary permissions are removed, we will now configure the rights for the AD group GL_ROAMING_PROFIL_USERS so that members can create a subfolder dedicated to the user. Click on the Add 1 button.
Click on Select a principal 1 .
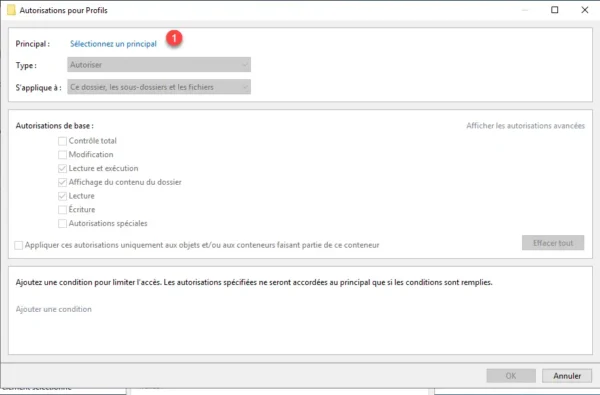
Select the AD group that will contain users with a roaming profile 1 and click OK 2 .

The group is selected, in the Applies to field, select This folder only 1 then click on Show advanced permissions 2 .
In the permissions select: Folder list / data reading 1 and Folder creation / data addition 2 . Click on OK 3 to validate.
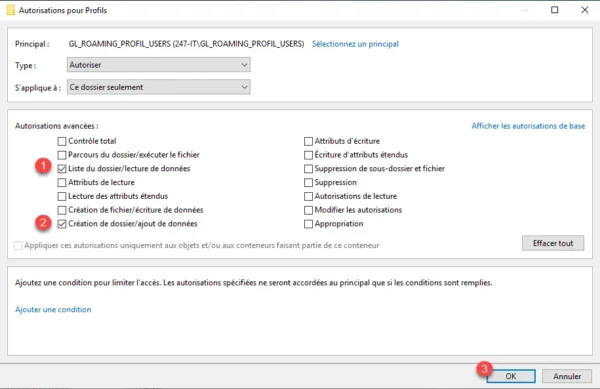
The NTFS permissions are added, click Apply 1 and OK 2 to save them.
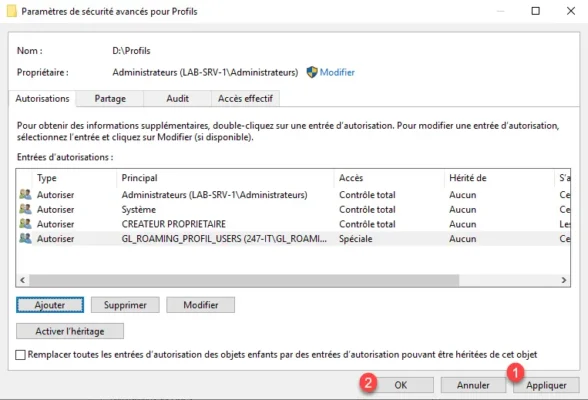
Close the Profiles folder Properties window.
The file is ready as well as sharing.
In the sharing rights, I could have put the AD group that contains the users if I hadn’t used a DFS namespace.
This part is in theory optional, but since you are keen to “do well”, I will show you this part.
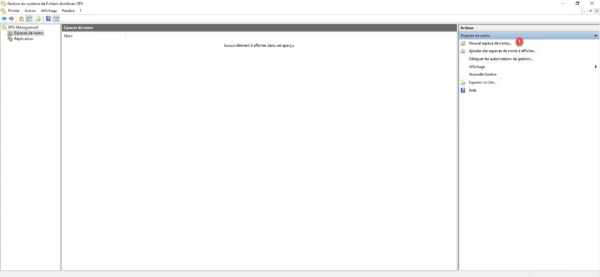
From the DFS Management console, click on New namespace 1 .
Indicate the server 1 which will host the namespace and click on Next 2 .
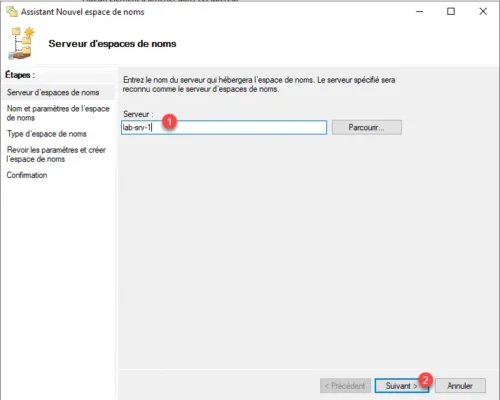
Generally the server is the one where the DFS role is installed.
Name the namespace 1 and click Next 2 .
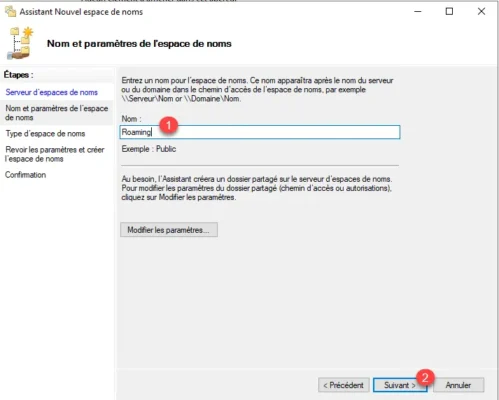
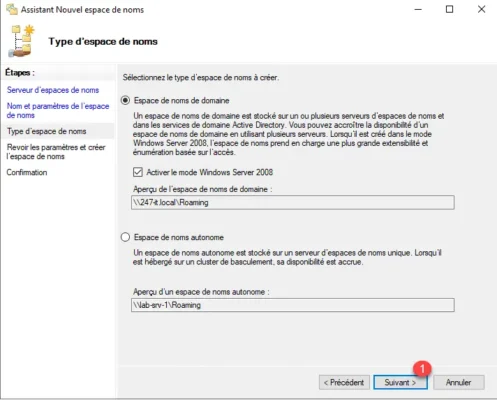
We leave Domain name space selected, click on Next 1 .
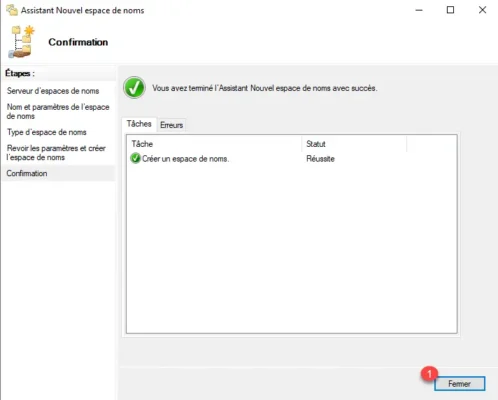
A summary of the namespace settings is displayed, click on the Create 1 button.
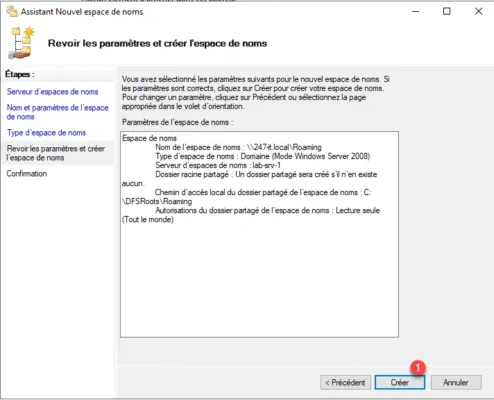
The namespace is created, click on Close 1 to exit the wizard.
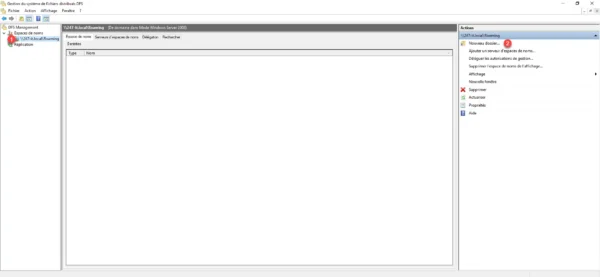
Now, we will add a folder to our namespace which will point to the profile sharing.
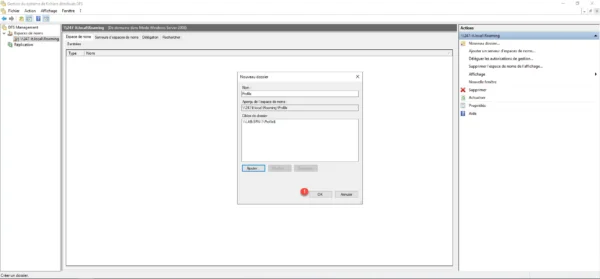
Select the 1 namespace and click on New Folder 2 located in the Actions panel.
Name the folder 1 and click Add 2 .
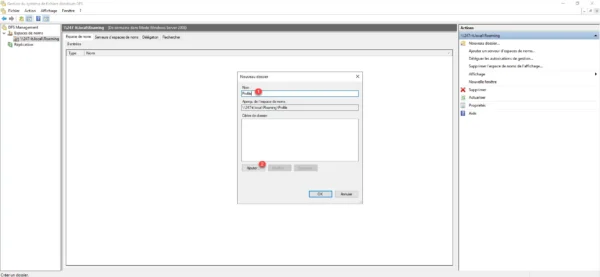
Enter the UNC path 1 of the share which will contain the profiles and click on OK 2 .
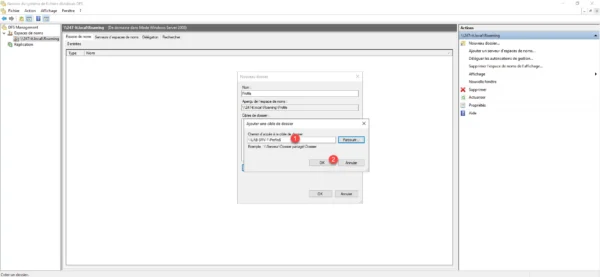
The folder is added, click OK 1 to add the folder to the namespace.
The folder is added.
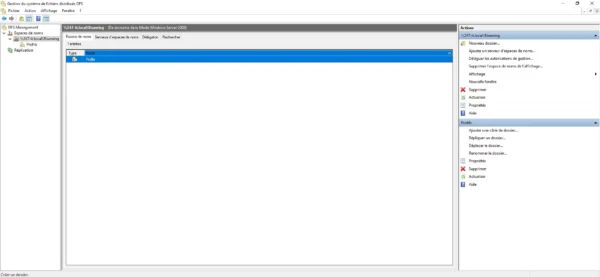
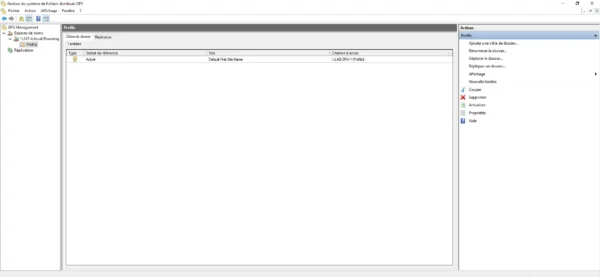
If you wish, test access to the share: \domain-name\name-space\folder.

To facilitate the administration of roaming profiles, we will create a GPO which adds NTFS rights to the Administrators group.
By default, when creating the user’s folder, exclusive rights are created, which prevents even administrators from accessing it, which can be annoying in case of support.
Create a GPO in the Group Policy Objects container and name it (C_ROAMING_PROFILE_CONFIG_ADM). Once created, right-click and click Modify.
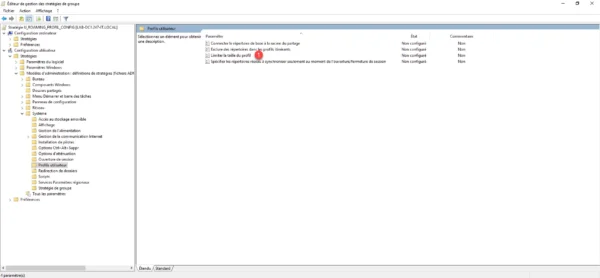
In the Group Policy Management Editor go to the following location: Computer Configuration / Policies / Administrative Templates / System / User Profiles.
Open the Add Administrator security group to roaming profiles 1 setting.

Activate 1 and the settings and click the Apply 2 and OK 3 buttons.
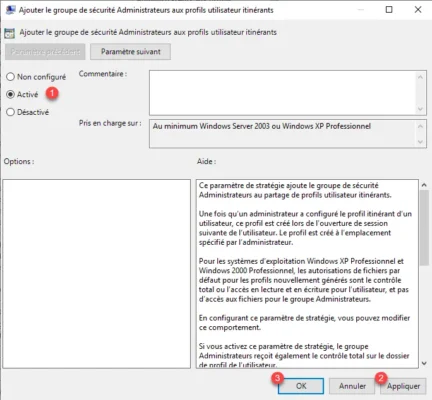
Close the editor then link the group policy so that it applies to computers that will be used by users who will have roaming profiles.
This part is optional, it just explains how to apply a size limitation to the profile.
Create a GPO in the Group Policy Objects container and name it (U_ROAMING_PROFILE_CONFIG). Once created, right-click and click Modify.
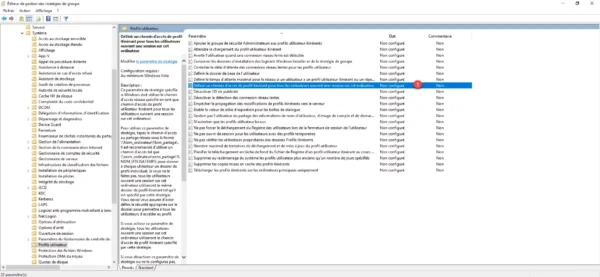
Go to the following location: User Configuration / Policies / Administrative Templates / System / User Profiles.
Open the Limit profile size 1 setting.
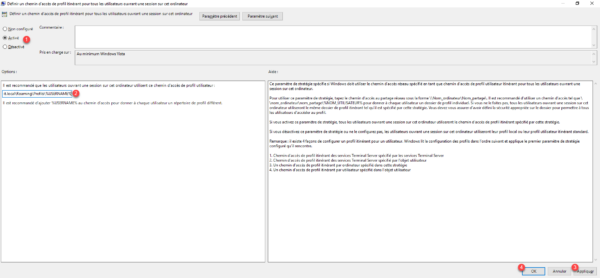
Enable the parameter 1 , configure the size limit in KB 2 and check the box Warn the user when the storage space for the profile is exceeded 3 , if necessary modify the message and frequency, then click on Apply 4 and OK 5 .

Close the editor.
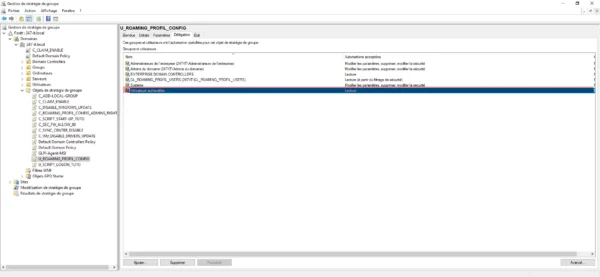
In the security filtering part, delete and Authenticated Users and add the users group which contains the users who will have a roaming profile, in the delegation tab, add the read right to the Authenticated Users object.
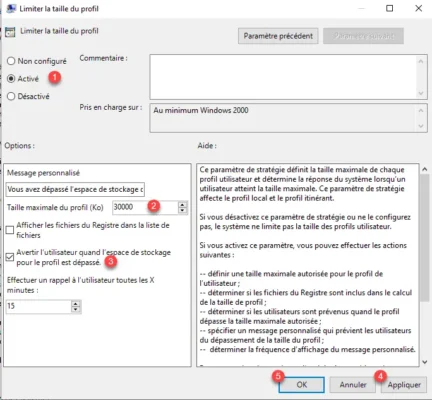
Bind Group Policy so that it is applied to users with a roaming profile.
When a user reaches the size limit, the profile is not synchronized.
We could also have applied a quota with FSRM.
We are done with preparing the environment, which is actually the largest part of this tutorial, we will now see how to configure roaming profiles so that they are applied to users.
As mentioned at the beginning, there are two ways to apply a roaming profile:
In both cases, if you followed the tutorial, you will need to add the users to the GL_ROAMING_PROFIL_USERS group so that it has permissions to write to the share.
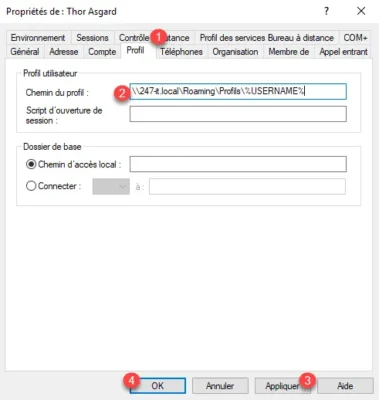
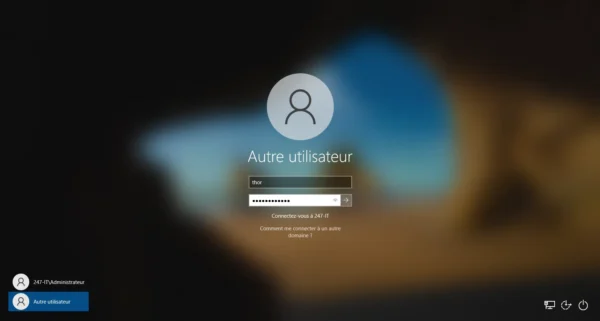
Here I added the user Thor Asgard into the group.
If the user does not have write rights to the share, he will just have a local profile because this cannot be synchronized.
Open the user properties and go to the Profile 1 tab. In the Profile Path field, indicate the UNC path of the share with the variable %USERNAME% at the end 2 (\UNC-PATH\Profiles\%USERNAME%). Then click on Apply 3 and OK 4 .
If you limit the application of Group Policy (GPO) to a group, consider adding the dedicated computers to the group.
Create a GPO in the Group Policy Objects container and name it (C_ROAMING_PROFILE_ENABLE). Once created, right-click and click Modify.
In the Group Policy Management Editor go to the following location: Computer Configuration / Policies / Administrative Templates / System / User Profiles.
Open the Set a roaming profile path for all users logging on to this computer 1 setting.
Activate the parameter 1 , indicate the UNC path 2 for storing the profile (\UNC-PATH\Profiles\%USERNAME%) and click on Apply 3 and OK 4 .
Close the editor, if necessary modify the security filtering to limit the application to a group by adding delegation for the Authenticated Users object.
Bind the policy to be applied to computers that will have users with roaming profiles.
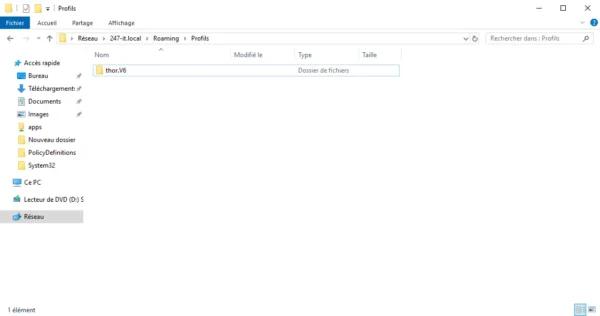
On a computer I open the Thor session.

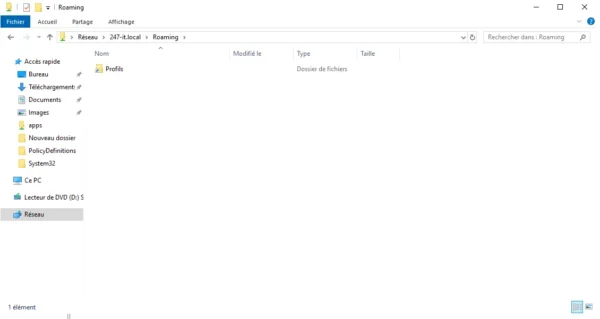
Looking on the server, we can see that Thor’s profile folder has been created.
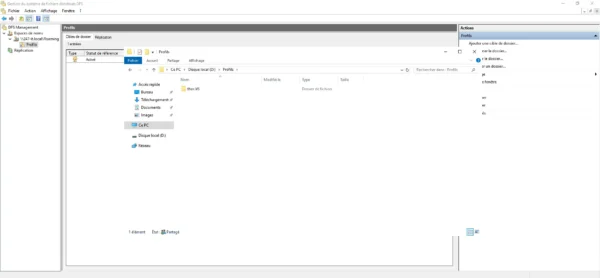
Behind the login is the version (.Vx) which will correspond to the version of Windows.
You will find the version correspondence here.
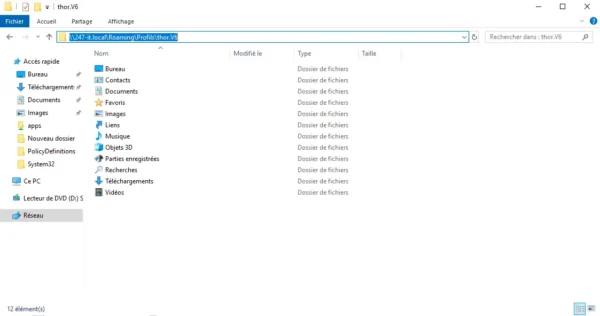
If you look in the folder it is currently empty.
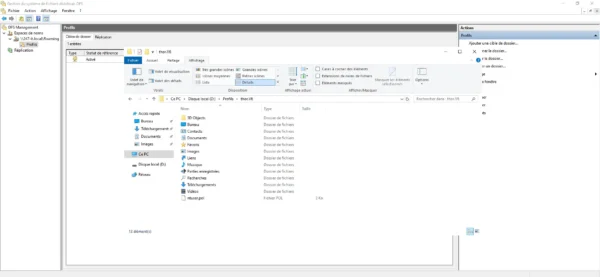
Log off the user and verify that the profile is synchronized.
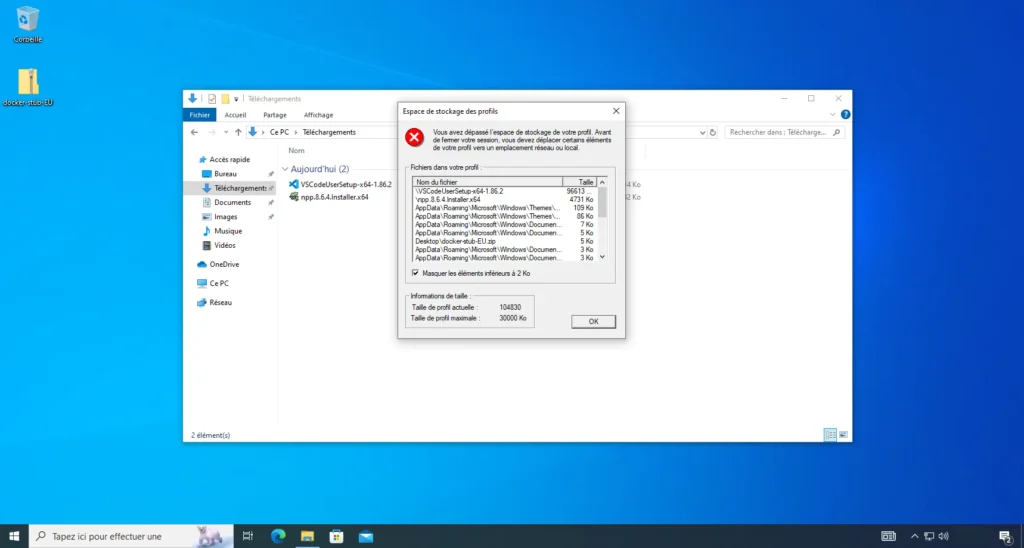
If you have activated a size limit on the roaming profile, it is possible to see the size.
In the notification area, click on the 1 icon.

A window opens with information on the profile’s disk space occupation.

In this tutorial, we saw how to set up roaming profiles.
In addition to this tutorial, I invite you to read the official Microsoft documentation: Folder Redirection, Offline Files, and Roaming User Profiles overview.
In the group policy settings, there are still elements that have not been covered, I will leave it to you to discover them and configure them if necessary.
At the beginning of this tutorial, I gave you a list of disadvantages to roaming profiles, if you have a need to store / save user-related data, there are many alternatives that can meet your needs.
Here are some of them:
Whatever the solution used, I do not recommend storing too large a PST archive which will cause synchronization problems.