The Eclipse WTP project provides tools for developing standard Java web applications. Typical web artifacts in a Java environment are HTML, CSS and XML files, webservices and servlets. Eclipse WTP simplifies the creation these web artifacts. It provides runtime environments in which these artifacts can be deployed, started and debugged.
In Eclipse WTP you create Dynamic Web Projects. These projects provide the necessary functionality to run, debug and deploy Java web applications.
Eclipse WTP supports all major web containers. This includes Jetty and Apache Tomcat as well as most Java EE application server. In this tutorial we use Apache Tomcat as the web container.
The tutorial describes the creation of a web application using Java servlets.
Your Eclipse IDE might already have the WTP tooling installed, in this case skip this step.
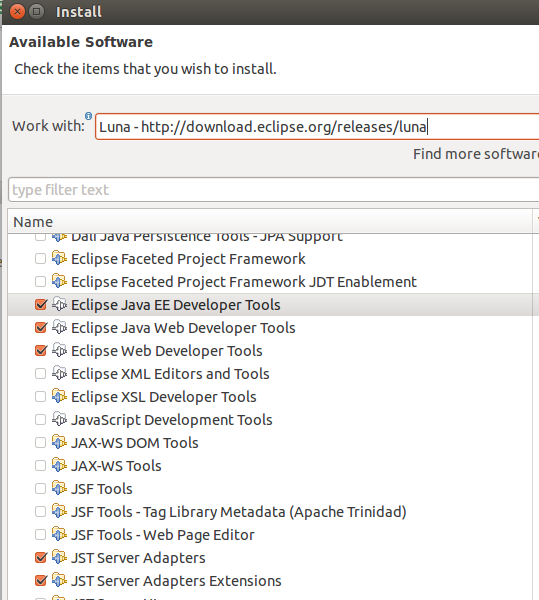
Use the Eclipse Update Manager to install the following features from the Web, XML, Java EE Developmentand OSGi Enterprise Development category.
Download the latest version of Tomcast from http://tomcat.apache.org/. Extract them to your file system.
If you have a local running Tomcat installation on your computer, stop Tomcat. Eclipse needs to start Tomcat itself for its deployments.
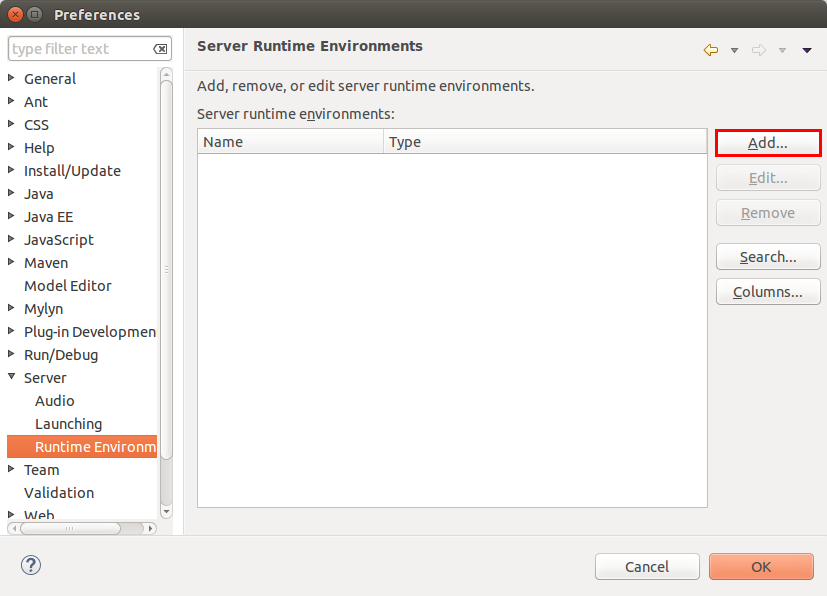
To configure Eclipse WTP, select from the menu Window Preferences Server Runtime Environments . Press the Add button.
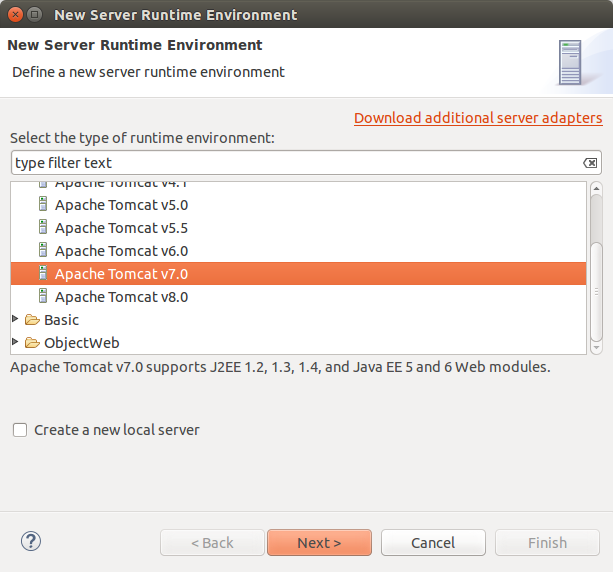
Select your version of Tomcat and select the Create a new local server flag.
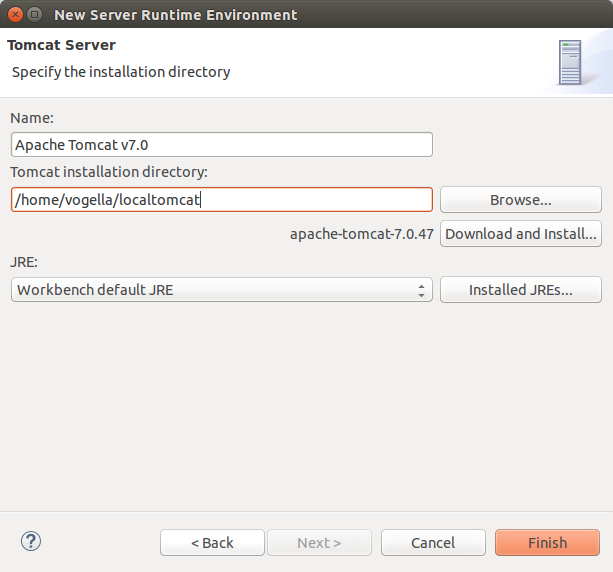
Point to your existing Tomcat download.
Eclipse allows downloading older versions of Tomcat from its preference page.
Press the Finish and afterwards OK.
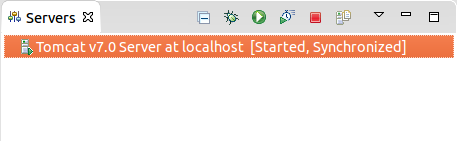
You are now control the Tomcat server instance from your Eclipse IDE.
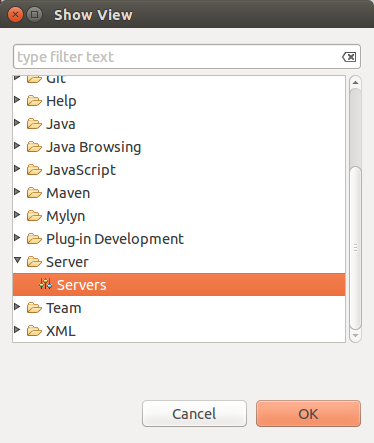
Once you have configure a local Tomcat server the Servers view allows you to start start and stop this server. To open this view select Window Show View Other… Server Servers… .
You can stop and start the Tomcat server via the Servers view.
In this exercise you create a servlet which works as a webpage counter. It tracks the number of visitors of the webpage and persists the number in a text file.
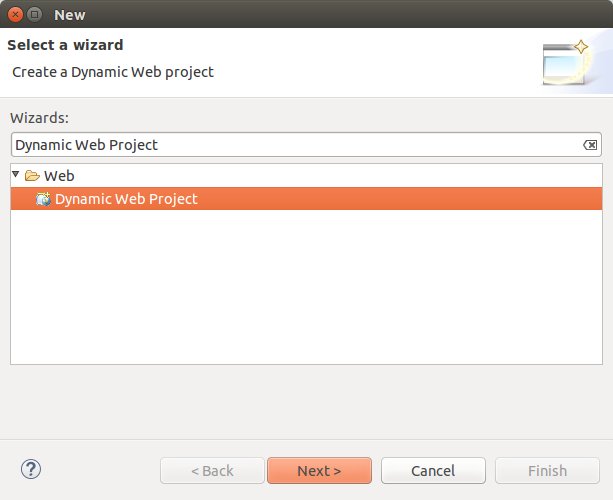
Create a new Dynamic Web Project called com.vogella.web.filecounter by selecting File New Other… Web Dynamic Web Project .

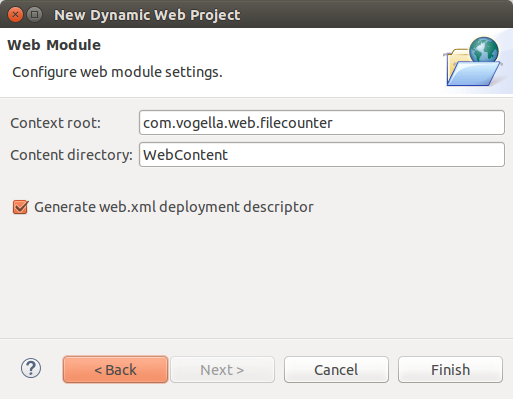
Press twice the Next button and select the Generate web.xml deployment descriptor on the last page.
Afterwards press the Finish button.
If Eclipse asks you, to switch to the Java EE Perspective answer yes.
A new project has been created with the standard structure of a Java web application. The WEB-INF/lib directory holds all the JAR files that the Java web application requires.
Create a new package called com.vogella.web.filecounter.dao.
Create the following new Java class to read and write the counter value to and from the file.
package com.vogella.web.filecounter.dao; import java.io.BufferedReader; import java.io.File; import java.io.FileReader; import java.io.FileWriter; import java.io.IOException; import java.io.PrintWriter; public class FileDao public int getCount() int count = 0; // Load the file with the counter FileReader fileReader = null; BufferedReader bufferedReader = null; PrintWriter writer = null; try File f = new File("FileCounter.initial"); if (!f.exists()) f.createNewFile(); writer = new PrintWriter(new FileWriter(f)); writer.println(0); > if (writer != null) writer.close(); > fileReader = new FileReader(f); bufferedReader = new BufferedReader(fileReader); String initial = bufferedReader.readLine(); count = Integer.parseInt(initial); > catch (Exception ex) if (writer != null) writer.close(); > > if (bufferedReader != null) try bufferedReader.close(); > catch (IOException e) e.printStackTrace(); > > return count; > public void save(int count) throws Exception FileWriter fileWriter = null; PrintWriter printWriter = null; fileWriter = new FileWriter("FileCounter.initial"); printWriter = new PrintWriter(fileWriter); printWriter.println(count); // make sure to close the file if (printWriter != null) printWriter.close(); > > >Create a servlet. Right-click on your project and select New Servlet .
Enter the following data.
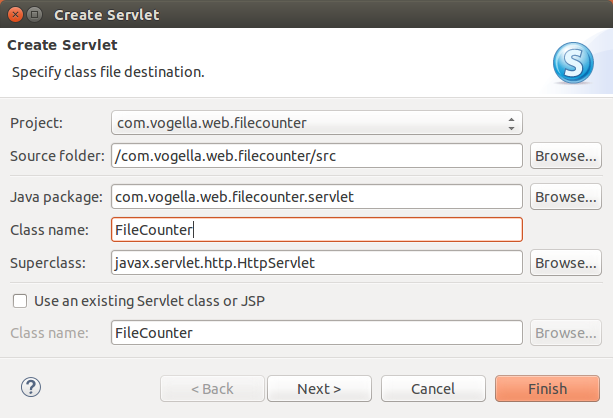
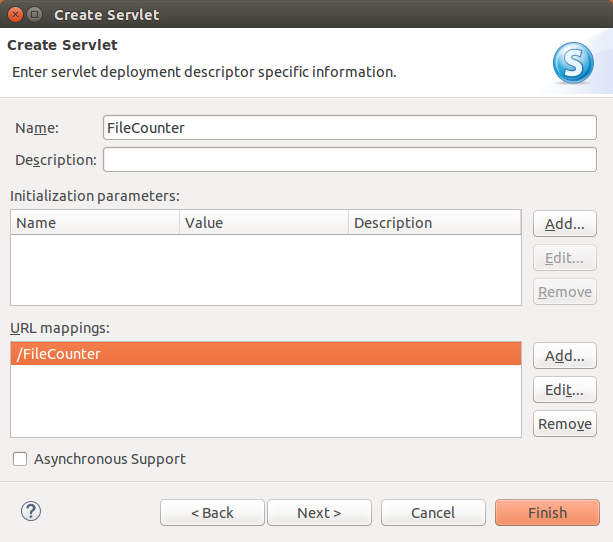
Press finish.
You could also create a servlet without the wizard. The wizard creates a Java class which extends the javax.servlet.http.HttpServlet and adds the servlet settings to the web.xml file.
Enter the following code.
package com.vogella.web.filecounter.servlet; import java.io.IOException; import java.io.PrintWriter; import javax.servlet.ServletException; import javax.servlet.annotation.WebServlet; import javax.servlet.http.HttpServlet; import javax.servlet.http.HttpServletRequest; import javax.servlet.http.HttpServletResponse; import javax.servlet.http.HttpSession; import com.vogella.web.filecounter.dao.FileDao; /** * Servlet implementation class FileCounter */ @WebServlet("/FileCounter") public class FileCounter extends HttpServlet private static final long serialVersionUID = 1L; int count; private FileDao dao; @Override protected void doGet(HttpServletRequest request, HttpServletResponse response) throws ServletException, IOException // Set a cookie for the user, so that the counter does not increate // every time the user press refresh HttpSession session = request.getSession(true); // Set the session valid for 5 secs session.setMaxInactiveInterval(5); response.setContentType("text/plain"); PrintWriter out = response.getWriter(); if (session.isNew()) count++; > out.println("This site has been accessed " + count + " times."); > @Override public void init() throws ServletException dao = new FileDao(); try count = dao.getCount(); > catch (Exception e) getServletContext().log("An exception occurred in FileCounter", e); throw new ServletException("An exception occurred in FileCounter" + e.getMessage()); > > public void destroy() super.destroy(); try dao.save(count); > catch (Exception e) e.printStackTrace(); > > >This code will read the counter from a file on the server and return plain text to the browser. The servlet will increase the counter if the user was inactive for 5 seconds.
You application must be deployed to the server and started there. Select your servlet or your project, right-click on it and select Run As Run on Server from the context menu and select your existing server.
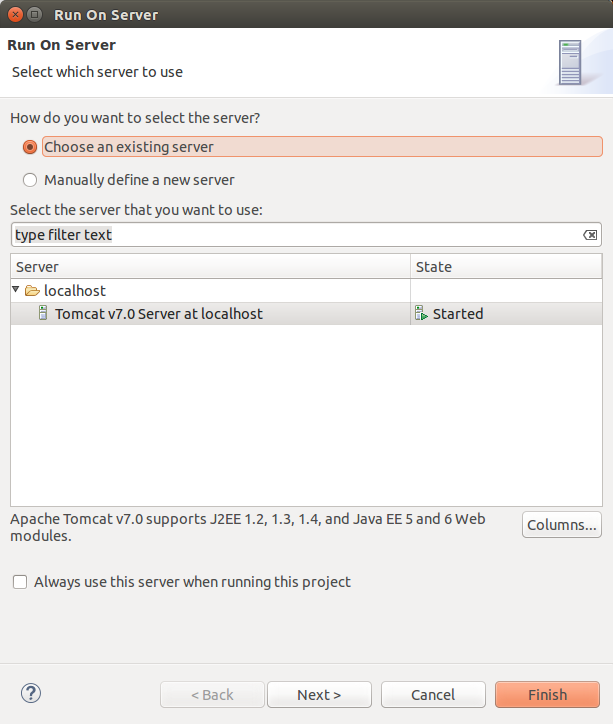
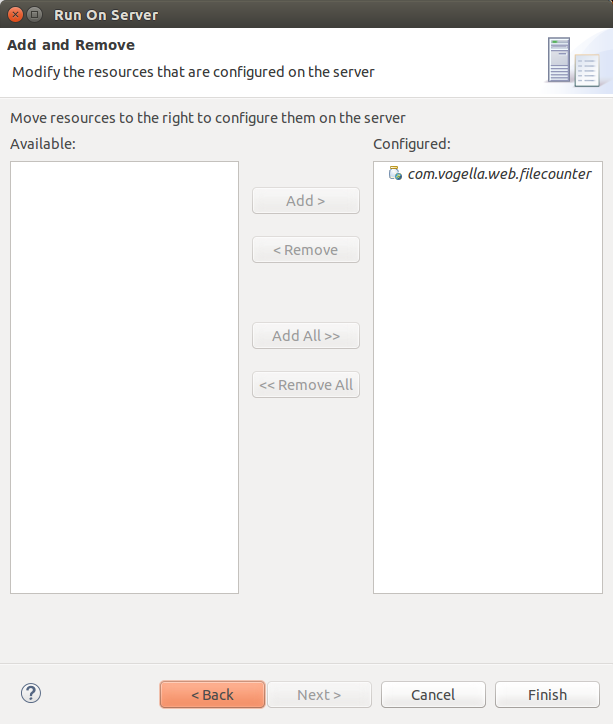
Ensure your servlet is selected to run on the server.
| In case you get the error "The Tomcat server configuration at \Servers\Tomcat v7.0 Server at localhost-config is missing. Check the server for errors.", simply delete the existing server configuration and create a new one. |
Press the Finish button.
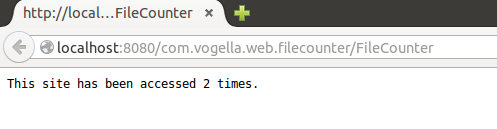
If the deployment was successfully you should be able to access your servlet via the following URL:
http://localhost:8080/com.vogella.web.filecounter/FileCounter
The servlet will return the number of times it was accessed. If you wait 5 seconds and refresh the browser, the number should increase.
Congratulations. You created your first working servlet with Eclipse WTP!
The following describes how to create a Web Archive (WAR) from Eclipse.
Right-click on the project and select Export.
Specify the target directory and press Finish.
You can now import the WAR file to your production Tomcat system and test the web application.